I wanted a wrist rest that actually matches my AJAZZ AKS075 Alice keyboard: the front edge is not a simple rectangle, the center has an Alice-style V shape, and the final part needs to be printable on a normal desktop 3D printer.
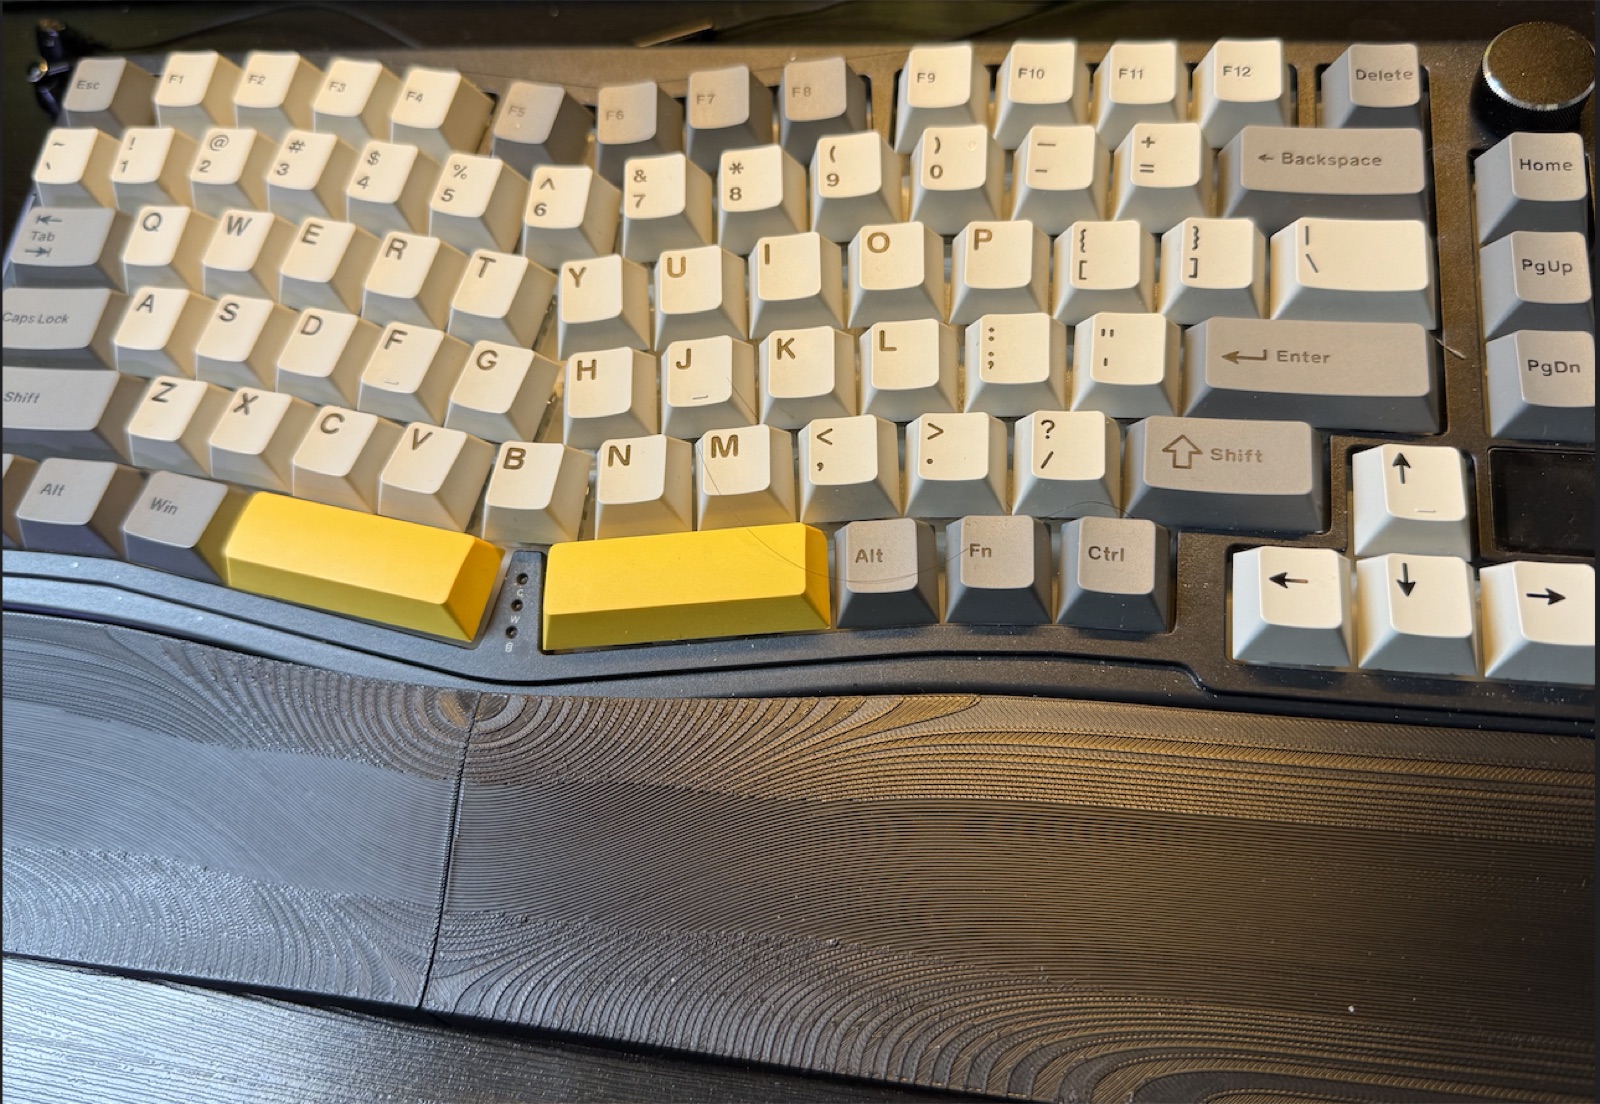
The final result: a split, 3D-printed wrist rest fitted to the AJAZZ AKS075 Alice keyboard.
The interesting part is not just the wrist rest. The experiment was whether I could use a Codex agent as the CAD operator: describe the shape in normal language, let the agent drive Blender through Python, inspect the result, correct it, and repeat. I did not need to learn Blender first.
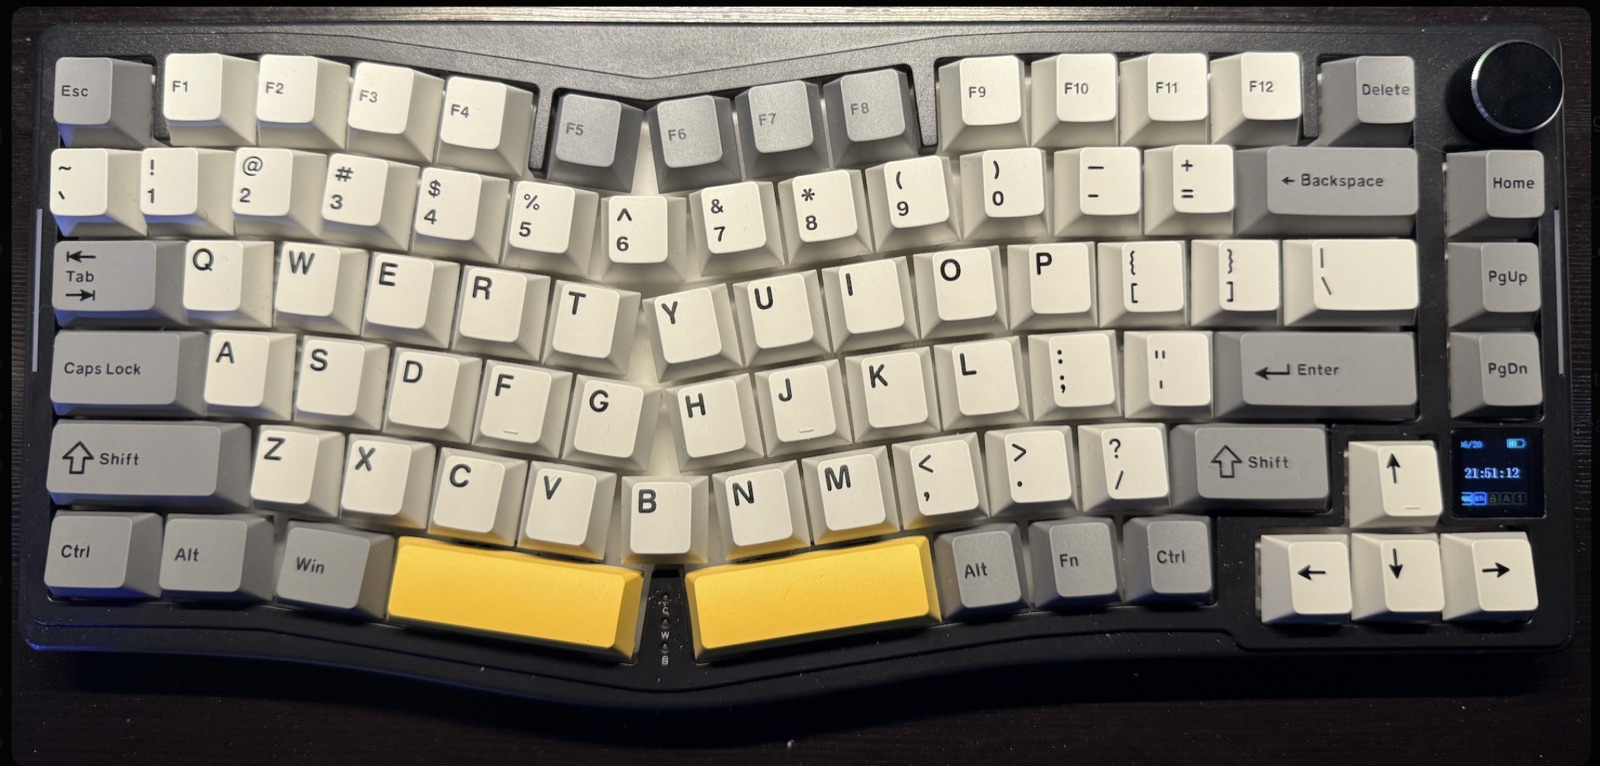
The keyboard that drove the shape: an AJAZZ AKS075 Alice layout with an asymmetric front edge and a center V that a normal rectangular wrist rest would not follow.
The Shape
The target was a low-profile, ergonomic wrist rest for the AKS075 layout. The overall footprint is about 328 × 60 mm, with an asymmetric Alice V matching the keyboard case. The top surface is not flat: it rises toward the split seam and falls smoothly toward the outside edges.
The final printable version is split at the V seam. The left side has fused trapezoid tenons, and the right side has matching female slots, so the two halves can be assembled after printing.
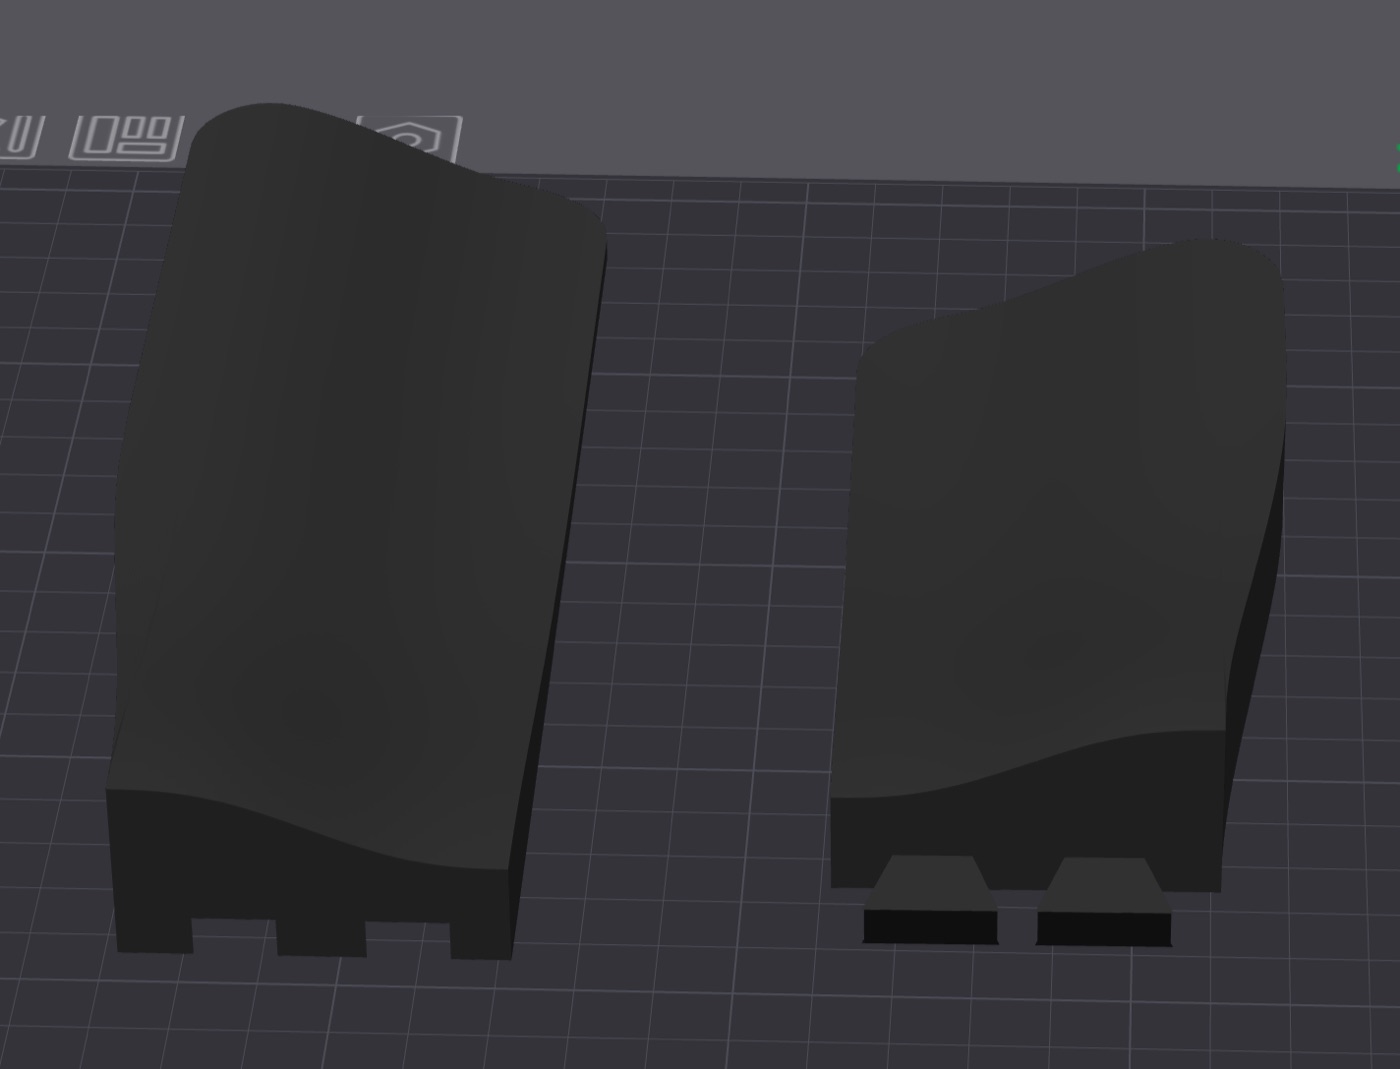
Split print version. The left part carries the fused male connector; the right part has the matching mortise slots.
The Messy Middle
This was not a one-shot result. The first versions got the outline roughly right, but the details kept breaking in ways that only became obvious when looking from another angle or thinking like a slicer:
- the V notch was mirrored or shifted in the wrong direction;
- the “middle of the V” was misunderstood as a surface region instead of the split seam itself;
- the first ergonomic surface looked too patchy under angled light;
- a ring-based mesh created visible transition creases;
- the mortise-and-tenon connector looked right visually, but the male tenons were exported as separate loose shells instead of being fused into the left body.
The final version only became trustworthy after checking the mesh like a printable object: the horizontal V stayed identical to the non-ergonomic reference, the top surface became one continuous heightfield, and the left split STL imports as one loose part with the tenons fused into the body.
Print Result
The final slicing estimate in Bambu Studio for a P2S:
PrinterBambu Lab P2S
MaterialPLA
Print time2h 17m
Filament92.40 g
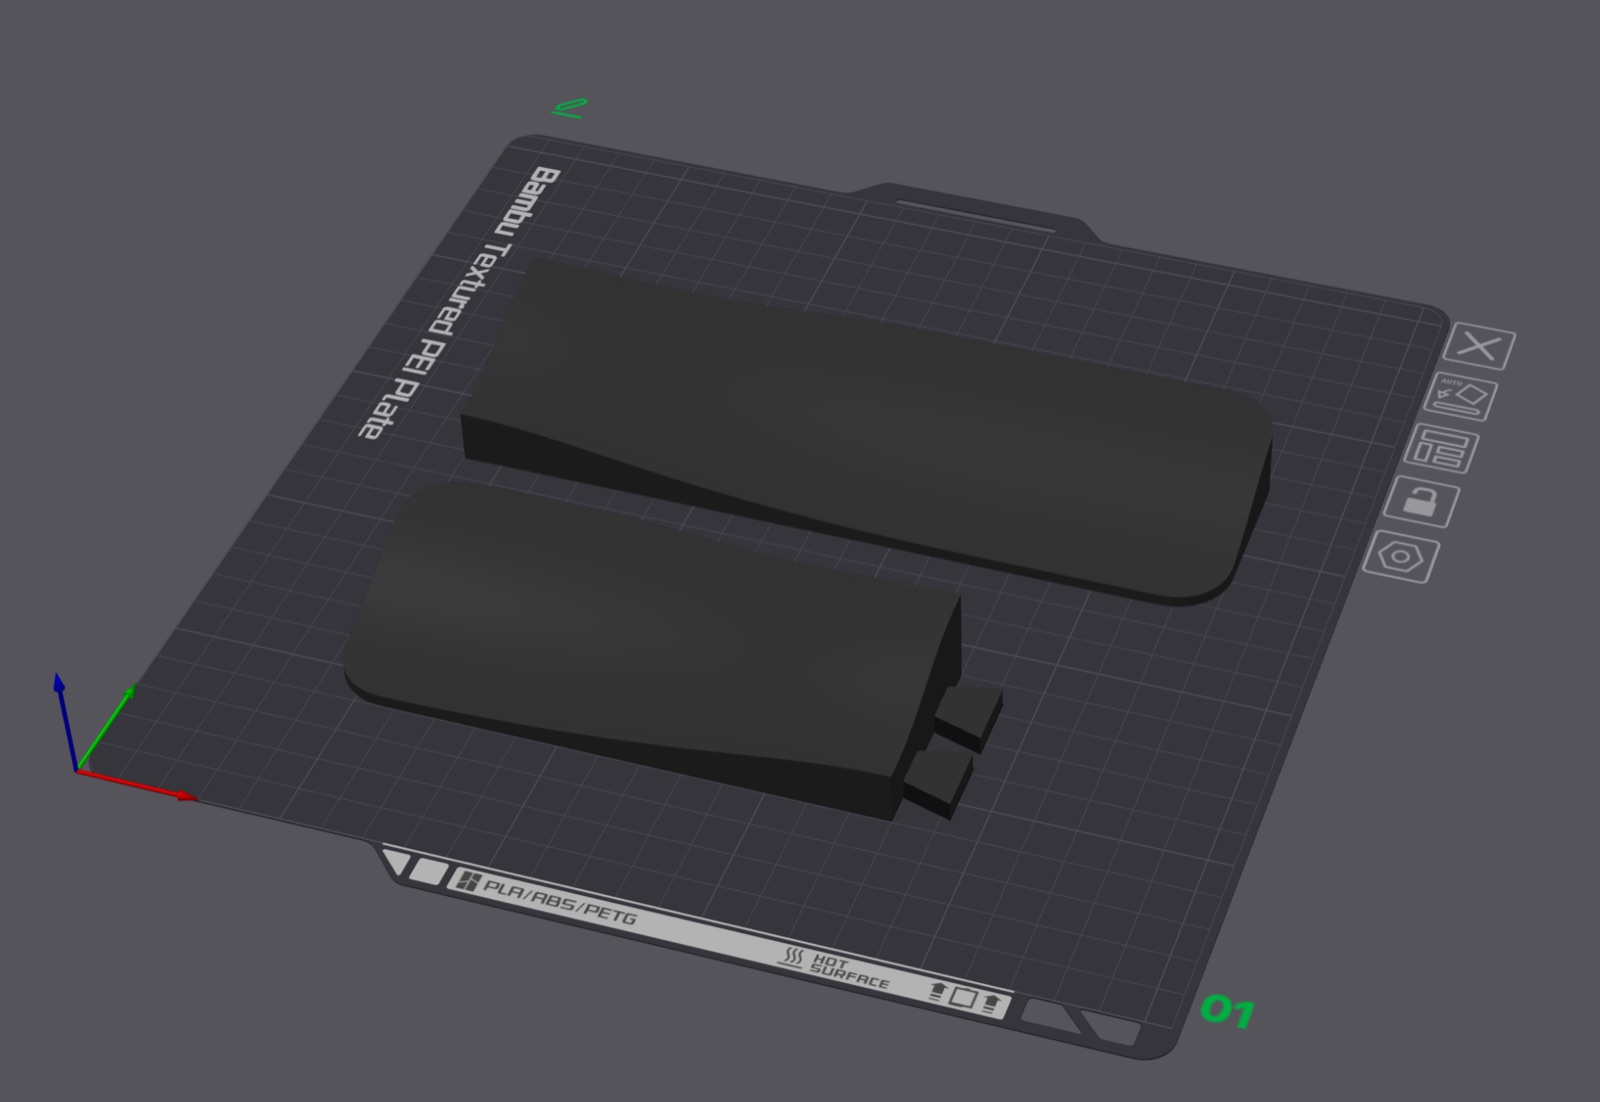
The final split layout in Bambu Studio before printing.
STL Files
The split files are the practical print files. The full STL is included as a reference model.
What Worked
This was absolutely possible with an AI coding agent. The agent wrote Blender Python, generated STL files, opened the scene for inspection, and iterated on the geometry: outline shape, rounded V transitions, split parts, continuous top surface, and a mortise-and-tenon connector.
The key advantage is that the interface becomes language:
“Make the middle of the V higher, keep the horizontal V shape unchanged, make the top convex, and split it into two printable parts.”
That is a very different feeling from learning a full CAD tool before making the first usable object.
What Was Painful
It still took several rounds. Some mistakes were subtle but important: a surface that looked smooth under one light could show creases under another, and a connector that looked visually correct still needed to be verified as one fused printable body. For 3D printing, “looks right” is not enough; the STL has to be checked as a real manufacturable mesh.
The lesson: AI can be a useful CAD operator, but the human still needs to inspect, measure, print, and correct. It is less like pressing a magic button and more like pairing with a very fast junior CAD assistant who can write Blender code.
Next Time
I think the faster workflow will be:
- Use image generation or a sketch tool to produce front / top / side CAD-style reference views first.
- Confirm dimensions and connector intent on those 2D views.
- Then ask the agent to build the real 3D model in Blender.
That should reduce the back-and-forth because the agent will have a clearer geometric target before writing any mesh code.
So the conclusion is: yes, using Codex to build a printable 3D object is a practical path, even without Blender skills. It is not magic, but it is a real new workflow.